
Check Azure AD Connect version
Start Azure Active Directory Synchronization Service from the programs menu. Click in the menu bar on Help > About. Azure AD Connect version 1.6.16.0 shows up
Export Azure AD Connect configuration
Before you migrate Azure AD Connect to another server, you must create an Azure AD Connect export configuration.
Start Microsoft Azure Active Directory Connect from the programs menu. Click on Configure.
Check Azure AD Connect user sign-in settings
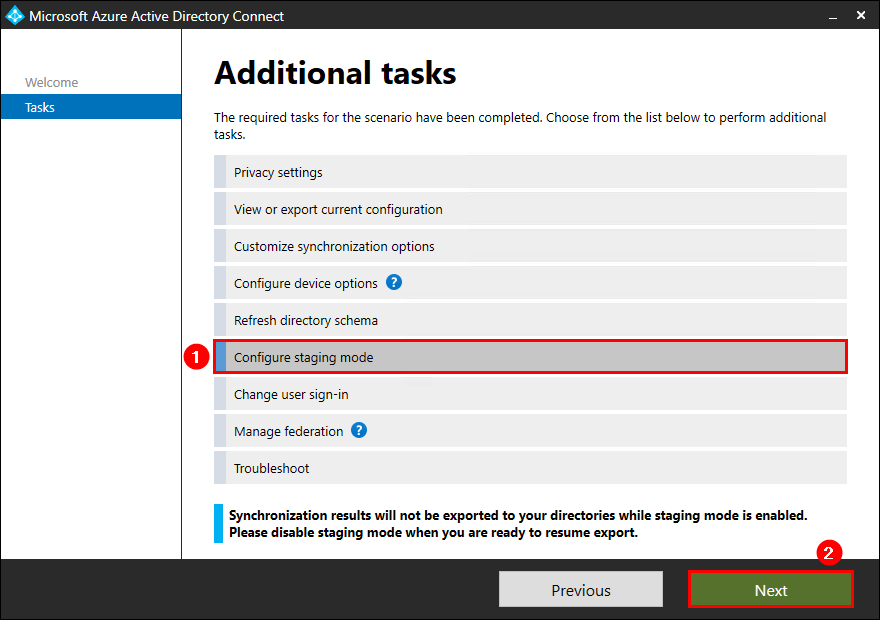
Go back to the Additional tasks. Click on Change user sign-in. Click Next.
Note: The Azure AD export configuration will not export the User sign-in settings. Write the settings down.
New Azure AD Connect server
Sign in to the Windows Server that you will install Azure AD Connect on. Go through the steps to import the Azure AD configuration settings and install Azure AD Connect.
Enable TLS 1.2 on Azure AD Connect server
Before we download and run the upgrade to Azure AD Connect V2.0, we must enable TLS 1.2 on the Azure AD Connect server. If we don’t do that and run the Azure AD Connect setup file, we can get the Incorrect version of TLS message.
Incorrect version of TLS
TLS 1.2 is not configured on this server.
This installation requires TLS 1.2, but it was not enabled on the server. Please refer to this document to learn more about the steps you need to take to enable TLS 1.2 on your server. After configuring TLS 1.2, please run the AADConnect Wizard to continue with installation and configuration.
Run PowerShell ISE as administrator on the new server
Paste the script in PowerShell ISE and run the script.
Download Azure AD Connect V2
Download the latest Azure AD Connect version
Save the AzureADConnect.msi file in C:\install folder.
Install Azure AD Connect V2
Double-click the AzureADConnect.msi file, and let the setup extract the files. Agree to the license terms and click Continue.
Import synchronization settings
Check the checkbox Import synchronization settings. Browse to the exported Azure AD Connect .json file. Click Install.
User sign-in settings
Select the same User sign-in settings configured on the old Azure AD Connect server. In the previous step, you did take a screenshot of these settings or wrote it down.
We use Password Hash Synchronization, with Sign Sign on Enabled, Click Next.
Create hybrid identity administrator account
With Azure AD Connect V1, we enter our Azure AD global administrator account. In Azure AD Connect V2, we can use a user account with the Hybrid Identity Administrator user role. We no longer need the Global Administrator role for this.
We recommend using an account with the least privileges. So, we will create a service account for the Hybrid Identity Administrator and use that from now on.
Sign in to the Azure AD portal. Navigate to Azure Active Directory > Roles and administrators. Search for the role Hybrid identity administrator. Assign the service account to the role.
Connect to Azure AD
Enter your Azure AD global administrator credentials or the hybrid identity administrator credentials. Click on Next.
Connect directories
You can get an error that it can’t connect to Active Directory. Click on Change Credentials.
You can select account option:
- Create new AD account: Azure AD Connect will create an AD DS Connector account (MSOL_xxxxxxxxxx) in AD with all the necessary permissions.
- Use existing AD account: Provide an existing account with the required permissions. Read more on how to create an AD DS Connector account.
I had already pre-created the account, so I filled in those credentials. Then clicked on OK.
The Active Directory is successfully added. Click Next.
Ready to configure
Ensure that you check both checkboxes. Click Install.

Wait for the Azure AD Connect upgrade to finish.
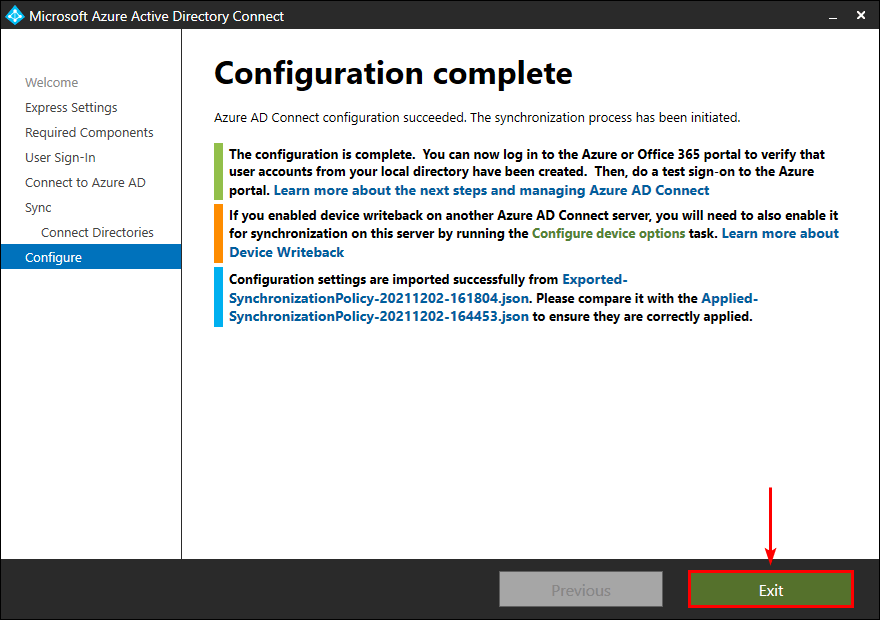
Configuration complete. Azure AD Connect configuration succeeded, and the synchronization process has been initiated. Click Exit.
Verify Azure AD Connect version
Verify that Azure AD Connect V2 is successfully installed.
Start Azure Active Directory Synchronization Service from the programs menu. Click in the menu bar on Help > About.
Verify Azure AD Connect synchronization
Verify that the synchronization status shows the status success. It should not show any errors or permissions issues.
This can be completed with the management tool, however once you see this:
The success events are what you need......
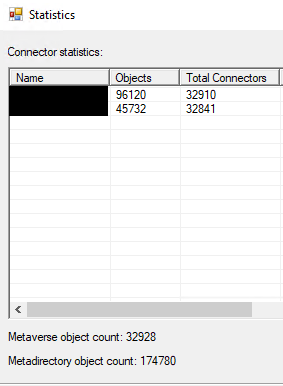
Then if you want to be extra cautious you can check the statistics, to complete this in the Synchronisation Service manager click Tools then Statistics....

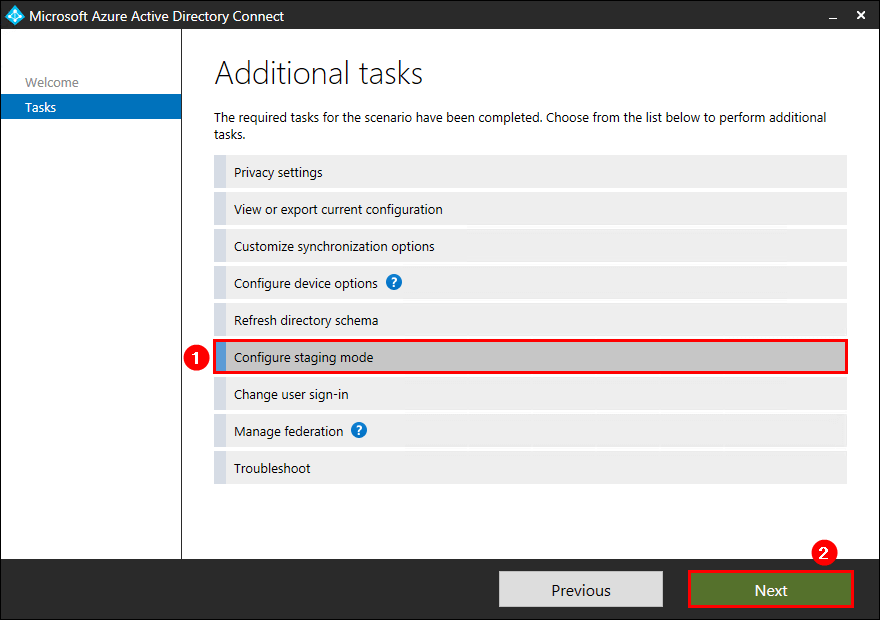
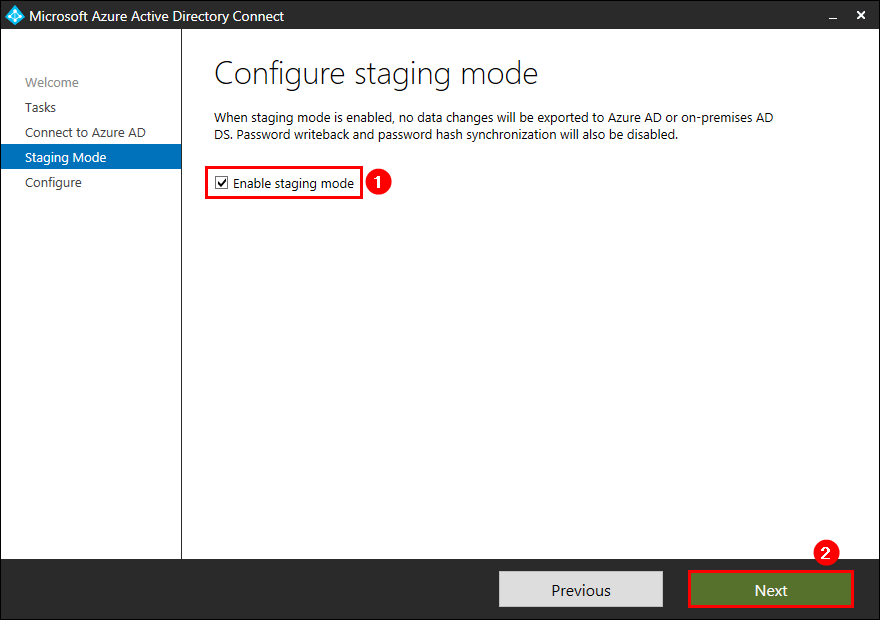
Enable staging mode on old server
On the old server, start Microsoft Azure Active Directory Connect. Click on Configure and select Configure staging mode. Click Next.
Fill in the Azure AD global administrator or hybrid identity administrator credentials. Click Next.
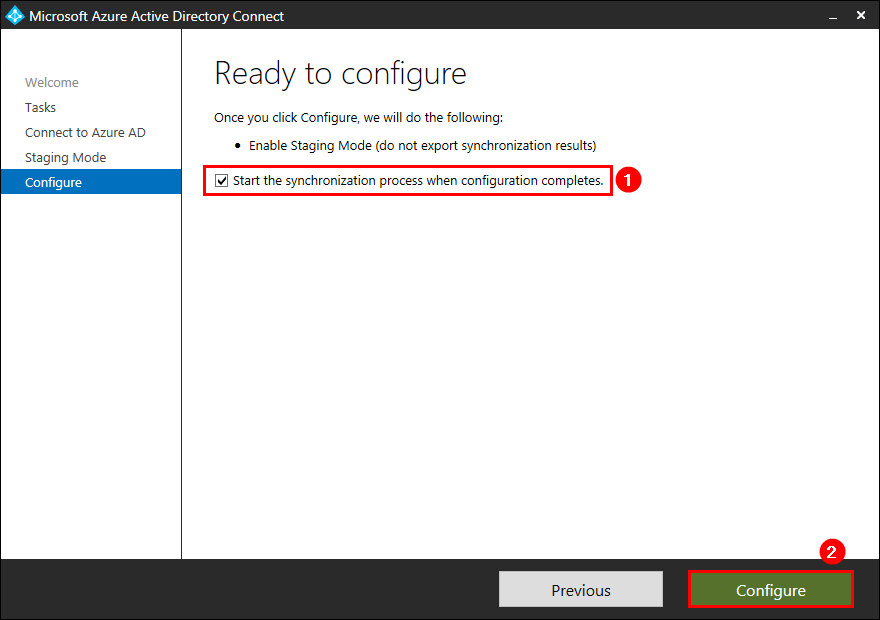
Check the checkbox Start the synchronization process when configuration completes. Click configure.
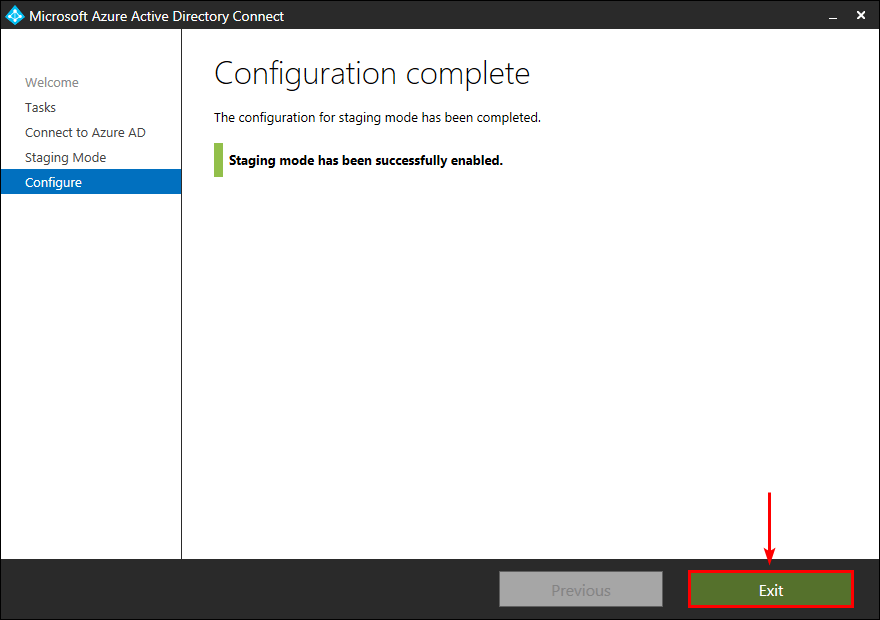
Staging mode is successfully enabled on the old Azure AD Connect server. Click Exit.
Disable staging mode on new server
On the new server, start Microsoft Azure Active Directory Connect. Click on Configure and select Configure staging mode. Click Next.
Fill in the Azure AD global administrator or hybrid identity administrator credentials. Click Next.

Check the checkbox Start the synchronization process when configuration completes. Click configure.

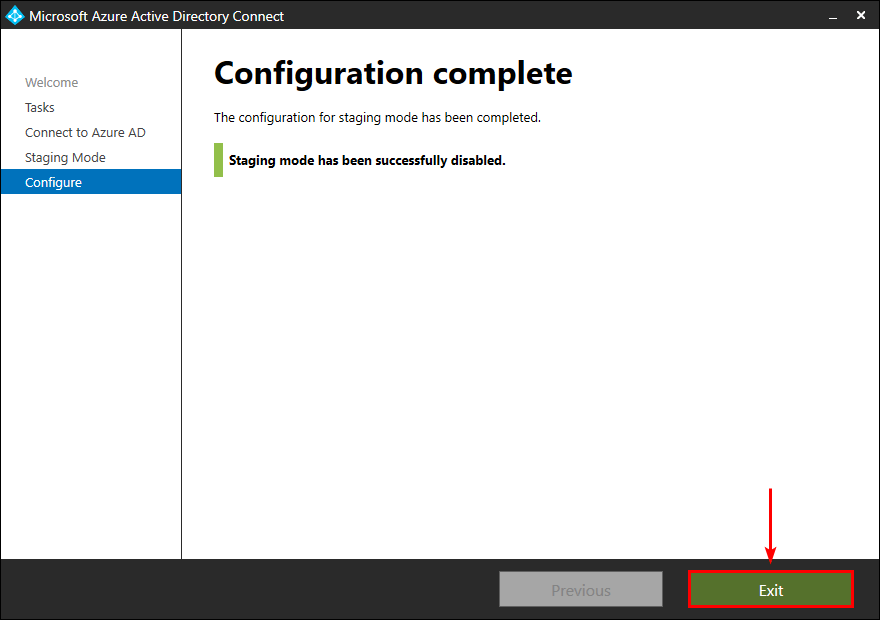
Staging mode is successfully disabled on the new Azure AD Connect server. Click Exit.
Check Azure AD Connect synchronization
Start Azure Active Directory Synchronization Service. Verify that the synchronization status shows as success.
If you don’t have the Azure AD Connect tile, you can navigate to Health > Directory sync status.
Once you have completed all the steps above when you visit this URL:
https://admin.microsoft.com/Adminportal/Home?#/dirsyncmanagement
You will notice that the if you are using password hash syncronisation then this website will inform you of the following:
| Last password sync | 145 minutes ago |
|---|
You will also notice you get a yellow warning triangle, this is down the fact that the Azure website has not updated the "source" of this data, it is not as immediate of the last sync attribute, I needed to leave a couple of hours, then on the old AD connector server I ran this :
Set-ADSyncScheduler -SyncCycleEnabled $False
Then after a good couple of hours the directory sync website updated, however if you want to know why the site has not updated then look in the Application event log for the event ID 663 that should look like this:
Password hash synchronization manager is alive and running.
<forest-info>
<partition-name>bears.local</partition-name>
<connector-id>be12e3678214f-5a86-b311-af9474a445d1</connector-id>
</forest-info>
Once you see that event you then shortly see a green tick in the health status once again, and the world is once again right.
Uninstall Azure Azure AD Connect
The last steps when all is well with the new server would be on the old server:
- Uninstall Azure AD Connect
- Remove old AD DS Connector account
- Remove old Azure AD Connector account
- Destroy the server if its a VM
I would highly recommend you do this next day, as the current configuration means you have your new AD-Connect v2 server syncing from AD to AAD, and you also have your old AD-Connect v1 server syncing from AD to AAD however the older server is in staging mode - so nothing is written to AAD.
However if you look at the old AD-Connect v1.x server using this command:
Get-ADSyncScheduler
You will notice this is returned, and the one is bold here is the issue, this tells Ad-Connect its in staging mode - as it do not write data to AAD.....
AllowedSyncCycleInterval : 00:30:00
CurrentlyEffectiveSyncCycleInterval : 00:30:00
CustomizedSyncCycleInterval : 00:15:00
NextSyncCyclePolicyType : Delta
NextSyncCycleStartTimeInUTC : 18/04/2022 07:04:57
PurgeRunHistoryInterval : 7.00:00:00
SyncCycleEnabled : False
MaintenanceEnabled : True
StagingModeEnabled : True
SchedulerSuspended : False
SyncCycleInProgress : False
However, if you get people unaware of what AD-Connect is all about and they notice that staging in on and then use our friend Google, you will quickly find that people will run this, as people do not seems to understand the "end to end" process but rather the "quick fix"
Set-ADSyncScheduler -StagingModeEnabled $False
Then you have a problem, issuing this command will not only mean you have AD-Connect servers, you will also have 2 password hash syncs and 2 SSPR endpoints, which will cause no end of issue - and that is not the fault to the technology.
This means once you AD-Connect v2 server is online and working well, the next day ensure you uninstall AD-Connect off the old server and if you have created new accounts like in this guide, disable those accounts as well.
This will stop pain in the long run, when you have 2xAD-Connect servers trying to update the same set of AAD data.