Preface
Right if you are using Logitech Devices with Teams and you are also using an MDM solution to manage these devices then you need to ensure you are reading the correct articles to get the correct picture
1. Create Rooms Account
We have an environment where we have hybrid Exchange, this means the rooms account need to be created locally in Exchange, so to complete this lets create a room accounts from ECP using the "New Room" option
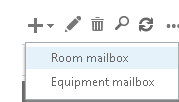
Once in ECP, navigate to the resources tab then click on the "Add" icon
Once you click Add choose the Room Mailbox option:
The rest of the screens are creating a room account, so you need a name and an alias, no images required, also fill in location and capacity, I have also manually placed this account on a different database but that is not required.
Once this account is created, you have a local room mailbox which is not that helpful to the Logitech system as it really need to be in Office 365, our configuration as its hybrid will not allow the primary domain to be used without it being migrated, so lets get on that now..........
2. Room account Configuration
The Room accounts by default are disabled and not accessible, however for this use case that cannot be true, so when you created the account ensure you move it to a OU that is synced with AAD via AD-Connect, this is our internal requirement....so the list is:
- Enable the account
- Set a secure password (over 32 characters I have used)
- Move to an OU that syncs to AAD
Ensure when you create the account is has the correct UPN, this should be the primary domain UPN
Once you have the account in an OU synced with AAD and the sync has completed, which is every 30 minutes by default ensure you can see the account, you should see the account with the correct e-mail address
These are the accounts I have created, the stuff behind the black box will need to be the UPN correctly formatted so if the domain is serverbear.cloud this should be serverbear.cloud not serverbear.onmicrosoft.com - if the same contains onmicrosoft.com check your UPN
Once this is complete and you have confirmed it, navigate to this URL : https://admin.microsoft.com once here, you need to ensure you are in active users:
Once you are in the active users, you need to find your accounts (or account) and ensure they have the correct licensing assigned (yes the boxes are wonky, not really the point)
The red box is required if you have
not moved the room mailbox to Office 365
The green box is required if the mailbox
has been moved to Office 365
In our case as the mailbox is local or not in Exchange the account requires two licenses, so to complete this you will need to select the account and choose the licensing tab, once here choose the Country which for us is "United Kingdom" then place a tick in the Office 365 E3 and Team Room Premium licenses boxes.
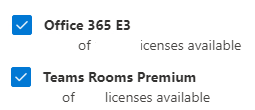
: Once the mailbox is migrated you are remove the Office 365 E3 license this is only required to migrate the mailbox, without this the migration will fail with errors.
3. Set the Display Name
This one is important, as you cannot have spaces in the account name but you can in the display name ensure that you set the display name correctly, so as you can see from above the display name is "STC 7.14" for example but that is NOT the account name, the display name will be displayed on the Logitech device in the upper left hand corner.
If this is set wrong and needs to be updated, once updated you will need to sign out of the Logitech device and sign in again to get the new name appear.
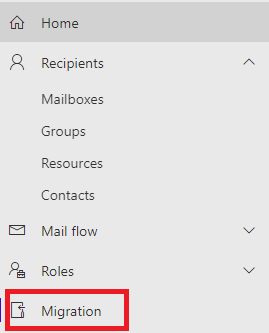
4. Migrate the Mailbox to Office 365 as a Room mailboxLets move the local mailbox to Exchange Online or EXO, to complete this navigate to: https://outlook.office365.com/ecp once here you need to navigate to the Migration tab....
Once here click "Add Migration" then the first is a name and a migration type, this is all normal and default
Next is the migration type which is "remote move migration"
Then you need a migration endpoint, select it from the drop box list, not shown here for obvious reasons but its called "migrate.serverbear.cloud" honest......
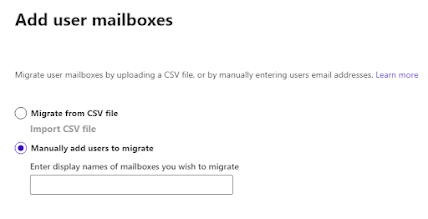
Then choose the accounts you need to migrate, with the manual add users to migrate......
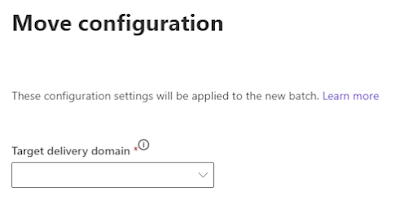
Then you will need to choose your target domain, which is the serverbear.onmicrosoft.com address, not shown again but honest it is:
Then you setup you options and schedule, here you can see it email me, amazing, and it will start immediately and it will completed when synced, so the whole process is automatic.......
You will receive a e-mail once the process has completed, then you can continue.
5. Device Restriction PolicyYou need to create a policy for these devices, this will be Priority 2 (in my case) and the Logitech rooms accounts will be added to the assigned group assigned to the policy, so lets get started....
Navigate to here : https://endpoint.microsoft.com/#home
Navigate to Devices
Click on Enrollment Device Platform Restrictions
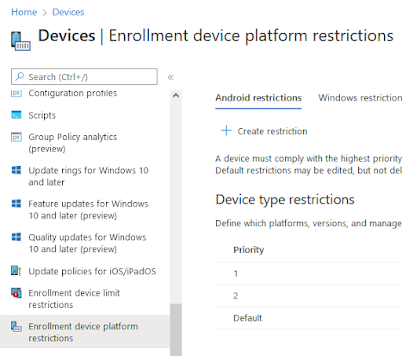
Once here ensure "Android Restrictions" is selected then click on "Create Restriction" (if this is greyed out then you are not a MDM administrator)
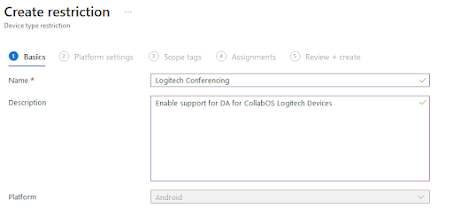
When this appears fill it in with the correct data as below, this is a cosmetic step......
Once done click next, then you get the juicy bits the platform settings, for this ensure EA is disabled as these devices do not support EA they are NOT MOBILE PHONES, then ensure DA is enabled with Android v10.0 as a minimum and personally owned is enabled, as below:
Scope tags are default, as below:
The final stage is assignment groups, here add the groups with all your rooms accounts so it only applies to those accounts.
6. Exclude devices from other Android policies
You will need to exclude all the policy you have assigned from an Android mobile phone as these are not mobile phones are such do not support mobile phones policies for MDM compatible phones.
First create a local AD group, not one in the cloud for this override, for example "Logi-PolicyExclude" and ensure its in an OU that is synced to AAD
To complete this navigate to Devices>Android>Configuration Profiles
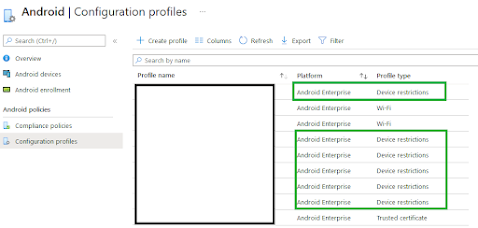
Blanked out policy names, but you only need to worry about the ones labelled "Device Restriction" so for each of these pop into the policy and under assignments click "Edit"
Once here click "Add groups" of which you can only add groups and add in the group you created earlier, then review and save.
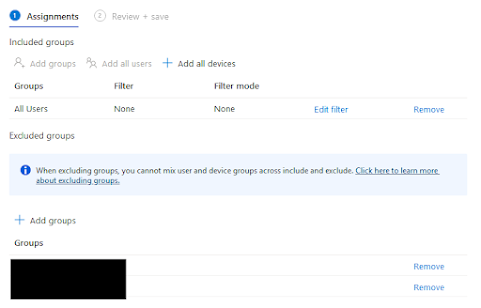
This needs to be completed to all the "Device Restriction" policies, then once done you are good to move on.
This is the simple bit, when the Logitech device boot up and you select "Teams" as your integration platform, you will be presented with a device code as shown below:
Once you have this simply navigate to the link below and enter that code in:
https://www.microsoft.com/deviceloginEnsure if you have ADFS or a single sign in product that you start this browser in "private browning" mode, you do not want these devices logging in as you, you need them logging in as the room account.
8. Check in Teams Admin
Once the device is in the Team welcome screen if you navigate to
https://admin.teams.microsoft.com/devices/collaborationbars you should notice that all your Android devices are now listed.
Username blanked out, but this is good, also please note it can take up to 5 minutes after the device being logged in to appear on the website, if you have got this far then you have completed the setup, relax!
9. Assign Policies
If you need to assign policies you can do so if you navigate to the URL below:
https://admin.teams.microsoft.com/devices/collaborationbars-configprofileClick Add, and all the options available to the devices will appear in this configuration screen, configure the options as required, ensing you use 24 hour clock, none of the 12 hour AM and PM rubbish then give the policy a name and save it.
This will not be applied to the devices, to assign the policy, select the device in question with the tick box and then choose Assign Configuration and select the policy you have created or the most relevent policy.
10. Set the Room procession options
First you will need to connect to Exchange Online as your mailboxes are in the cloud now, so to complete this you need to run this command, as I need a proxy I will need to get the one from IE/Edge before I can connect, so these are the commands:
$ProxyOptions = New-PSSessionOption -ProxyAccessType ieconfig
Connect-ExchangeOnline -PSSessionOption $ProxyOptions
If you do not need a proxy then the command is this:
Connect-ExchangeOnline
Note: Ensure you connect with modern authentication not basic authentication as this is being removed soon by Microsoft as its old and unsupported, this is old news, but its better to note it here
This is where you customise the room options for the meeting invites, by default Exchange will strip the comments and subject, so when you have a meeting you only get your name like "Croucher, Lee" so to get the subject of the meeting and your name and comments run the commands below:
Set-CalendarProcessing Logi.Tech@serverbear.cloud -DeleteComments $False
Set-CalendarProcessing Logi.Tech@serverbear.cloud -DeleteSubject $False
If you have enabled the Zoom or other options within Teams then you will want to allow external providers to be processed, as by default its only Teams, to complete that this is the command:
Set-CalendarProcessing Logi.Tech@serverbear.cloud -ProcessExternalMeetingMessages $True
If people have added attachments, again by default these are deleted, if you wish to preserve these then you will need to run this as well:
Set-CalendarProcessing Logi.Tech@serverbear.cloud -DeleteAttachments $False
Finally as these will be very public by that I mean anyone in the meeting room or pops into the meeting room can see what is coming up, by default calendar processing does not keep private appointments private
Therefore if you have a private appointment comes up as private in your calendar, it will no longer be private by default when you send it to a meeting room, if you would like to keep private meetings private which does not affect the visibility of the joins teams button, do you need to run this command on the team service account;
Set-CalendarProcessing Logi.Tech@serverbear.cloud -RemovePrivateProperty $False
Finally, if you want to allow conflicts in your meeting room run this command, this will allow the same meeting at the same time more than one, this is usually disabled and it usually a good idea, but your requirements dictate this setting:
Set-CalendarProcessing Logi.Tech@serverbear.cloud -AllowConflicts $True
Official Word on "Teams for Android"
Logitech has this to say on the matter:
"I
am sorry but this is not an option being CollabOS a locked-down,
hardened implementation of Android 10 purposefully configured for use as
a video conferencing appliance, CollabOS devices are enterprise managed
already (CollabOS <-> Sync/Portal) that works in the same
principle"
Microsoft has this to say on the matter:
Issue: Enroll Logitech Rally Bar in Intune
Scope:
This is an Advisory case, We can consider the case is ready for
archival, Once we are provide you a Solution in getting Logitech Rally
Bar device enrolled in Intune.
Discussion details
Please refer the following article for
Microsoft Android Teams room device enrollment in Intune Deploy Teams
phones, Teams displays, Teams panels, and Microsoft Teams Rooms on
Android using Intune - https://docs.microsoft.com/en-us/microsoftteams/devices/phones-displays-deploy#configure-intune-to-enroll-teams-android-based-devices
Microsoft Public Guidance on MDM policies
Teams Android-based devices are managed by Intune via Android Device Administrator (DA) management.
Before devices can be enrolled into Intune, then policies can be assigned from within Teams Admin centre.


